


Wick Sizes for Beeswax Candles: A Comprehensive Guide
Crafting and burning beeswax candles can be both a mesmerizing hobby and a soothing tradition. The soft glow of a beeswax candle can transform any space into a tranquil sanctuary, making beeswax a popular choice for artisanal candle makers and aficionados. However, the key to a perfect beeswax candle lies in the seemingly simple yet crucial component – the wick. With the vast array of wick sizes available, it's imperative to understand how to choose the right one. This comprehensive guide is tailored to candle enthusiasts, DIY crafters, and beeswax buyers alike, seeking precision in their candle crafting endeavors.
The Art of Choosing Wick Sizes
Selecting the appropriate wick size is fundamental to the success of your beeswax candle. The wick not only illuminates the candle but also plays a critical role in the distribution of heat, the rate of wax consumption, and the overall burning experience. Using the wrong wick size can lead to a host of issues including soot, tunnelling, and poor burn times. Let's delve into the intricacies of wick sizes and how to ensure your beeswax candles burn beautifully.
Understanding Wick Sizes
Wick sizes are typically denoted by the width or diameter of the candle they're designed for. For instance, a #1 wick generally suits candles with a diameter of one inch. However, these sizes are not universally standardized and may vary by candle. Hence, it's essential to find the appropriate wick for your specific candle size.
The diameter of the candle is not the only consideration when selecting a wick. The type of wax, additives, and the presence of any color or fragrance can also affect the burn rate and behavior. Beeswax, compared to other types of wax, tends to require a larger wick due to its higher melting point.
It's also worth noting that the length of the wick plays a role in the burning process, especially for taller candles. As a rule of thumb, the wick should be trimmed to a quarter inch before lighting to ensure a clean, even burn. Prioritizing these factors when choosing a wick can help you craft a beeswax candle that not only looks appealing but also burns efficiently and safely.
Square Braid: A Common Wick for Beeswax Candles
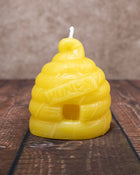
Square braid wicks are an excellent choice for beeswax candles. As the name suggests, these wicks are braided into a square shape, allowing them to burn with a slightly larger flame giving them a more robust and longer-lasting burn, compared to their round counterparts. This is particularly beneficial for beeswax candles, as the denser wax requires a hotter flame for optimal burning. Square braid wicks also tend to curl while burning, which helps with self-trimming and results in less soot and smoke. They come in different sizes - the larger the square braid wick, the larger the candle diameter it can support. As a rule of thumb, a small square braid wick is suitable for a candle up to 2 inches in diameter, while larger square braid wicks can accommodate candles over 3 inches in diameter. When crafting your beeswax candle, always take into account the specific diameter of your candle to determine the appropriate square braid wick size. As with any wick selection, however, it's important to test-burn your candles to ensure the ideal flame size and burn time for your specific beeswax candle.
The general convention is that a larger wick will result in a bigger flame and a faster burn, whereas a smaller wick will yield a smaller flame and a slower, more controlled burn. But choosing the size isn't only about the desired aesthetic; it must also take into account the candle’s specific characteristics.
Factors to Consider
Several factors influence the selection of the correct wick size:
Candle Diameter and Height
The size of your candle greatly affects the wick size you should use. A rule of thumb is that larger candles require thicker wicks to pull up more wax, while smaller candles need thinner wicks for a more controlled burn.
Wax Type and Composition
Different waxes have different melting points and compositions. Beeswax, for example, has a hotter melt pool and typically requires a larger wick than other waxes like soy or paraffin.
Desired Burn Time
If you're looking for long-lasting candles, you'll need to choose a wick that matches your beeswax's specific properties to maintain a steady flame that lasts.
Choosing the Right Wick Size
Now that you understand the basics, let's take a closer look at how to choose the best wick size for your beeswax candles.
Wick Size Recommendations Based on Candle Diameter
When you're starting a new project, it's handy to have some guidelines to work with. For a beeswax candle with a 2-inch diameter, you might consider a square braid wick, 100% cotton size #2. As the diameter increases, so should the wick size. For example, a 3-inch diameter may call for an #3, and a 4-inch might require a #4.
For taller candles, you'll also want to ensure the wick can handle the increased pull from the wax. Taller candles may require a wick with a larger diameter than recommended for their width to maintain a steady, efficient burn.
Adjustments for Different Wax Types
If you're working with a blend of waxes, you may need to test and observe how the wicks perform. Beeswax blends with other waxes can alter the burn characteristics, requiring adjustments to the wick size compared to pure beeswax candles.
To start, use a wick that's larger than you would for pure beeswax, as most blends will require a bit more heat to get going. Then test and adjust based on your observations.
Once you've chosen the wick size based on your calculations, it's crucial to conduct burn tests on sample candles to ensure the wick performs as expected. Burn tests should include observations over time, paying attention to flame size, burning rate, and wax consumption.
Testing and Troubleshooting
Conducting Burn Tests
Always test your chosen wick size in multiple candles before committing to a large batch. Light the candles and let them burn for at least two hours, observing the wicks’ performance throughout the burn. Be alert for:
- An excessively small or large flame
- Soot buildup on the wick or in the candle's container
- Tunnelling, where the wax melts down the middle and not to the edge
- The wick drowning in the wax
Identifying Common Issues and Solutions
If you notice an excessively small flame or tunnelling, switch to a larger wick size. If you see a large flame that's flickering or creating soot, your wick is too big. Drowning can be a bit trickier, as it requires adjusting the rate of wax consumption or the amount of air coming in contact with the wick.
Sometimes, the issues you encounter can be solved by other means like changing the way your mold releases air, altering the temperature at which you pour, or how you cool your candles once poured.
Tips for DIY Candle Makers
For those creating candles at home, there are additional tips to keep in mind:
- Never leave a burning candle unattended
- Place your candles on heat-resistant surfaces
- Keep candles away from drafts and anything flammable
- Store your candles in a cool, dark place to avoid color changes from sun exposure
Given the natural variations in wax and each individual crafter’s process, precise wick selection can never be truly standardized. The best way to find the perfect wick for your specific beeswax candle is through careful observation and testing.
Proper Wick Selection for Different Candle Types
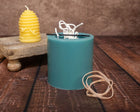
Different candle types require different wicks. Whereas a pillar candle might benefit from a square braid wick that can stand on its own as the wax melts, a container candle might need a bit of extra support, so you might opt for a wick with a stabilizing pin.
Troubleshooting Tips for Homemade Beeswax Candles
If you find that your homemade beeswax candles are burning poorly, don't be discouraged. It takes time to learn the nuances of candle making. Here are a few troubleshooting tips:
- For tunnelling, try a larger wick or pouring your candle at a higher temperature.
- To prevent your wick from drowning, ensure you're not pouring your wax too hot, which can melt the wick's wax sustaining coating too quickly.
- If you're experiencing excessive soot, try trimming the wick or using a smaller size.
Conclusion
Choosing the right wick size for your beeswax candle is both an art and a science. It requires careful consideration of your candle's specific dimensions, wax type, and desired performance. Remember, there's no one-size-fits-all solution, and the process of finding the perfect wick size can be as enjoyable as the candle making itself. With these tips and a bit of patience, you're on your way to crafting beeswax candles that burn brightly and beautifully every time. So, don your apron, gather your supplies, and let the soothing scent of beeswax fill your home with warmth and light.
Wick Size Chart
The following is a general guideline to help you choose the right wick size for your beeswax candles. However, always keep in mind that several factors may affect the burn, such as wax composition, color, fragrance, and even the shape and size of the container. Hence, it's always recommended to conduct a burn test.
| Candle Diameter (in inches) | Recommended Wick Size |
| --------------------------- | --------------------- |
Small Novelty | #4/0 Square Braid Wick|
Tapers |#2/0 Square Braid Wick|
| 1 | #1 Square Braid Wick |
| Up to 2 | #2 Square Braid Wick |
| 2 - 3 | #3 Square Braid Wick |
| 3 - 4 | #4 Square Braid Wick |
| 4 - 5 | #5 Square Braid Wick |
Note: This chart is a starting point, and adjustments may be necessary based on individual candle characteristics.
